The preset library allows you to design content modules once and use them on multiple pages simultaneously. Changes are automatically applied everywhere – without having to update each page individually.
Configure a module centrally and use it as a preset on as many pages as you like.
A change to the preset is automatically applied to all pages.
ℹ Note: The module preset library is not visible to all users. Only users with the Admin role and new-hp-editor have been initially assigned the module-libary-editor role and therefore have access to this feature. If colleagues on your team would also like to use the preset library, please check in the Team Management section of your profile whether the module-libary-editor role has been assigned to them, or assign it to them (or ask your account admin). For more information, read to the end of this help article.
What is a preset?
A preset is a globally saved module – for example, a benefits block with specific content, a layout, and styling. You create the module once centrally and can then use it on multiple pages simultaneously.
If you update the preset later, your changes are automatically applied to all pages where the preset is used, whether they are custom pages or job page templates.
Navigation in the editor
In the left sidebar of the page editor, you will find three icon buttons at the top that you can switch between. The middle icon has now been added with the new preset library:
| Name | Icon | Function |
|---|---|---|
| Page editor |  | Shows all modules on the current page. Shared modules are marked as such with a special icon. |
| Preset library New |  | New central overview for managing presets – independent of any individual page. |
| JobShop settings |  | Global JobShop settings and settings for the current page, as before. |
How to use the preset library
Switch to the preset library in the editor (middle icon). Click the plus button (or alternatively the "Add first module" button) to create a new preset. The same dialog as when adding regular modules will open: first select the module type, then choose the desired layout variant.
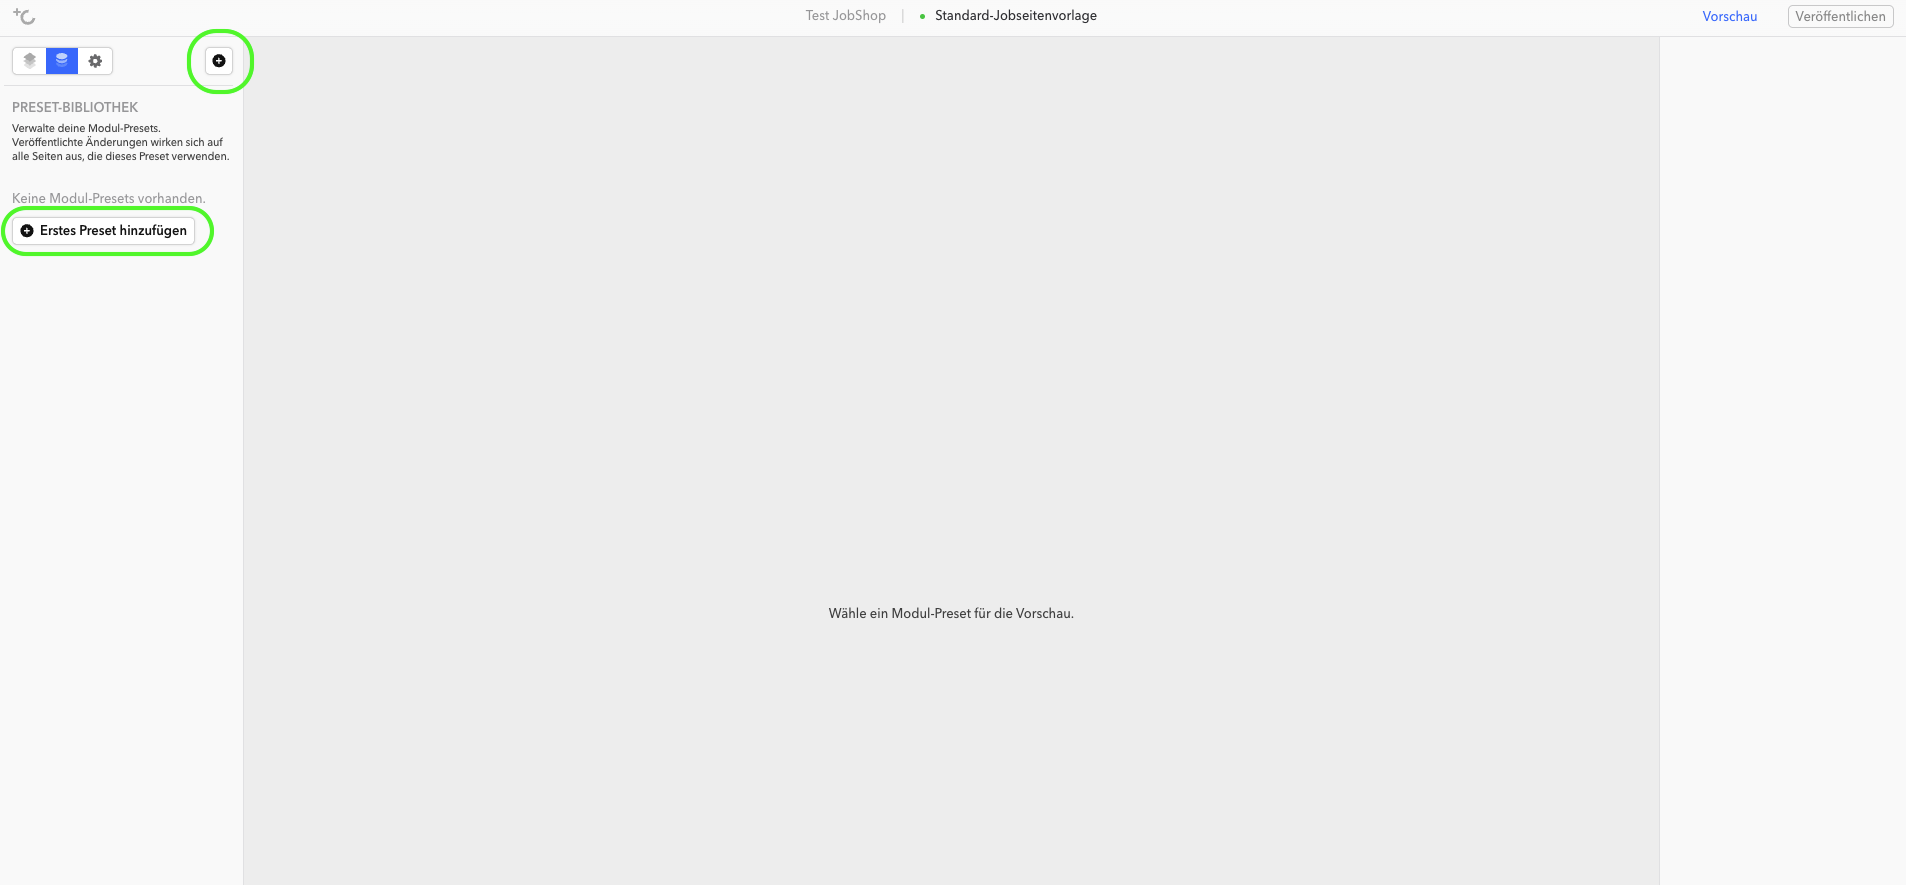
In the preset library, existing presets are listed on the left. Click on a preset to see a preview. At the same time, a column for editing the preset appears on the right.
The preset editor works identically to the regular module editor: you can edit the template variant, colors, display, style, and spacing.
Your changes are saved automatically. To use the preset in the page editor and publish changes to all pages where it is used, you need to publish the preset.
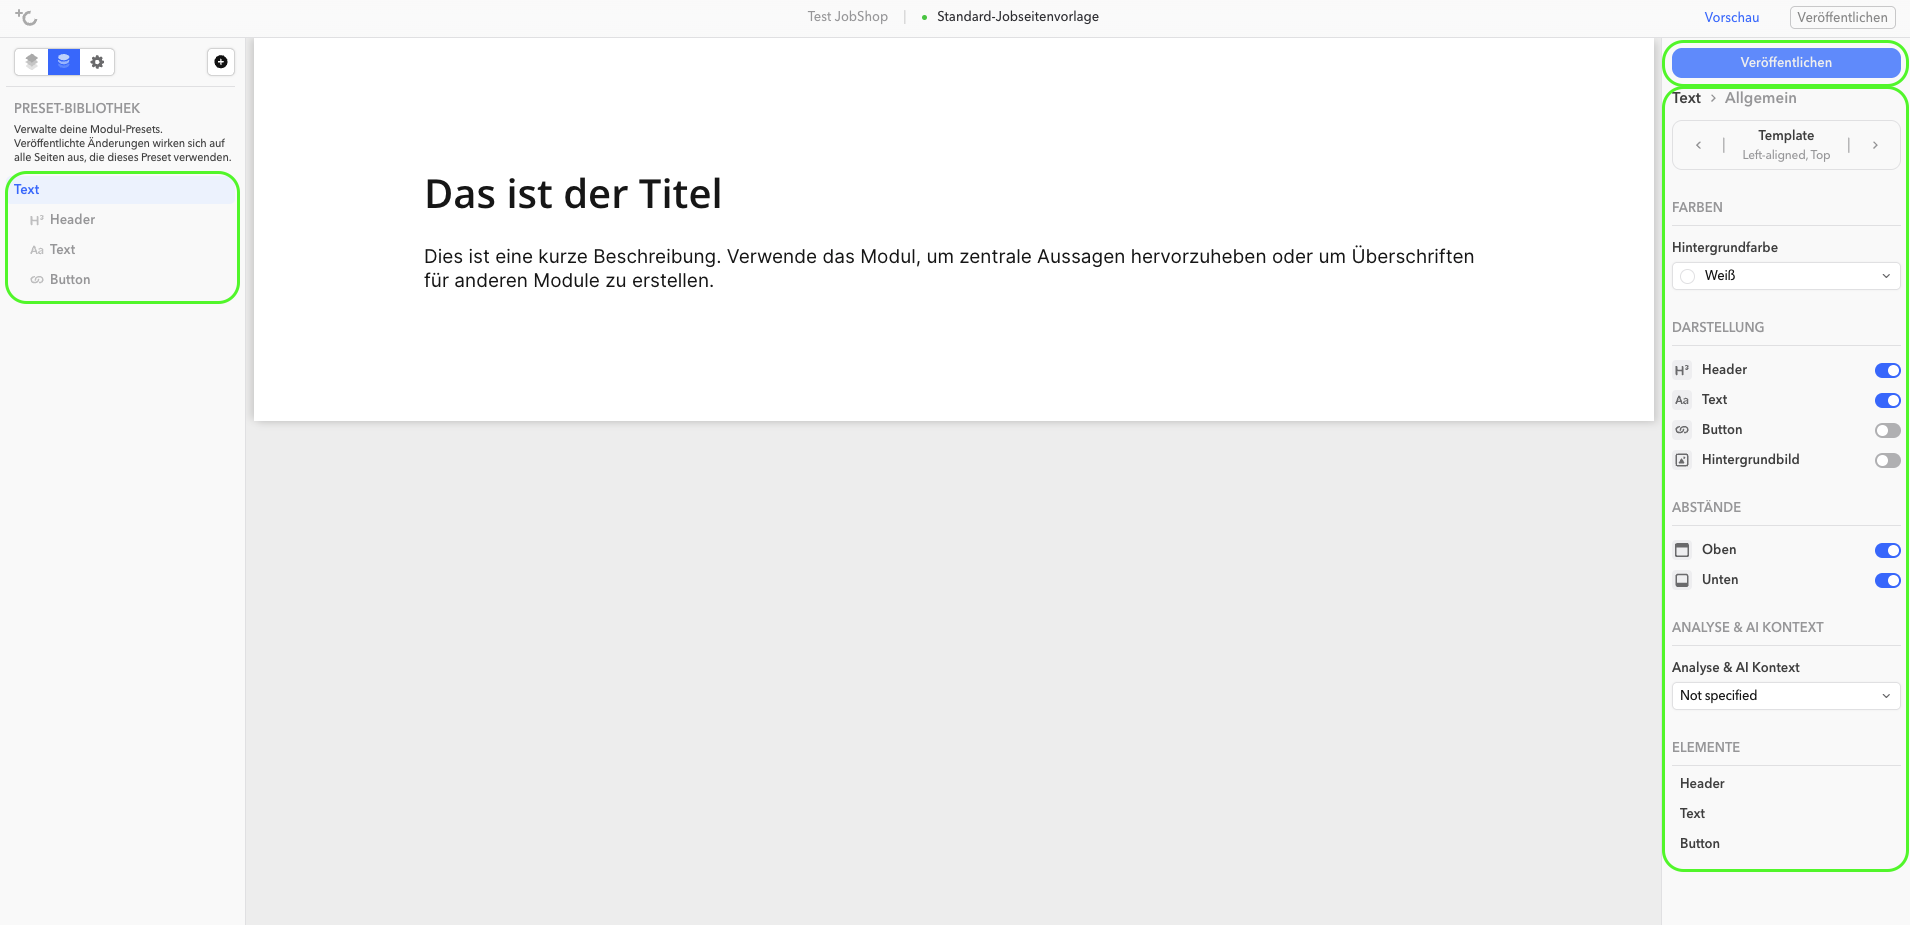
Rename a preset: Double-click on the name of the preset in the left column. Once the cursor appears, you can freely edit the name.
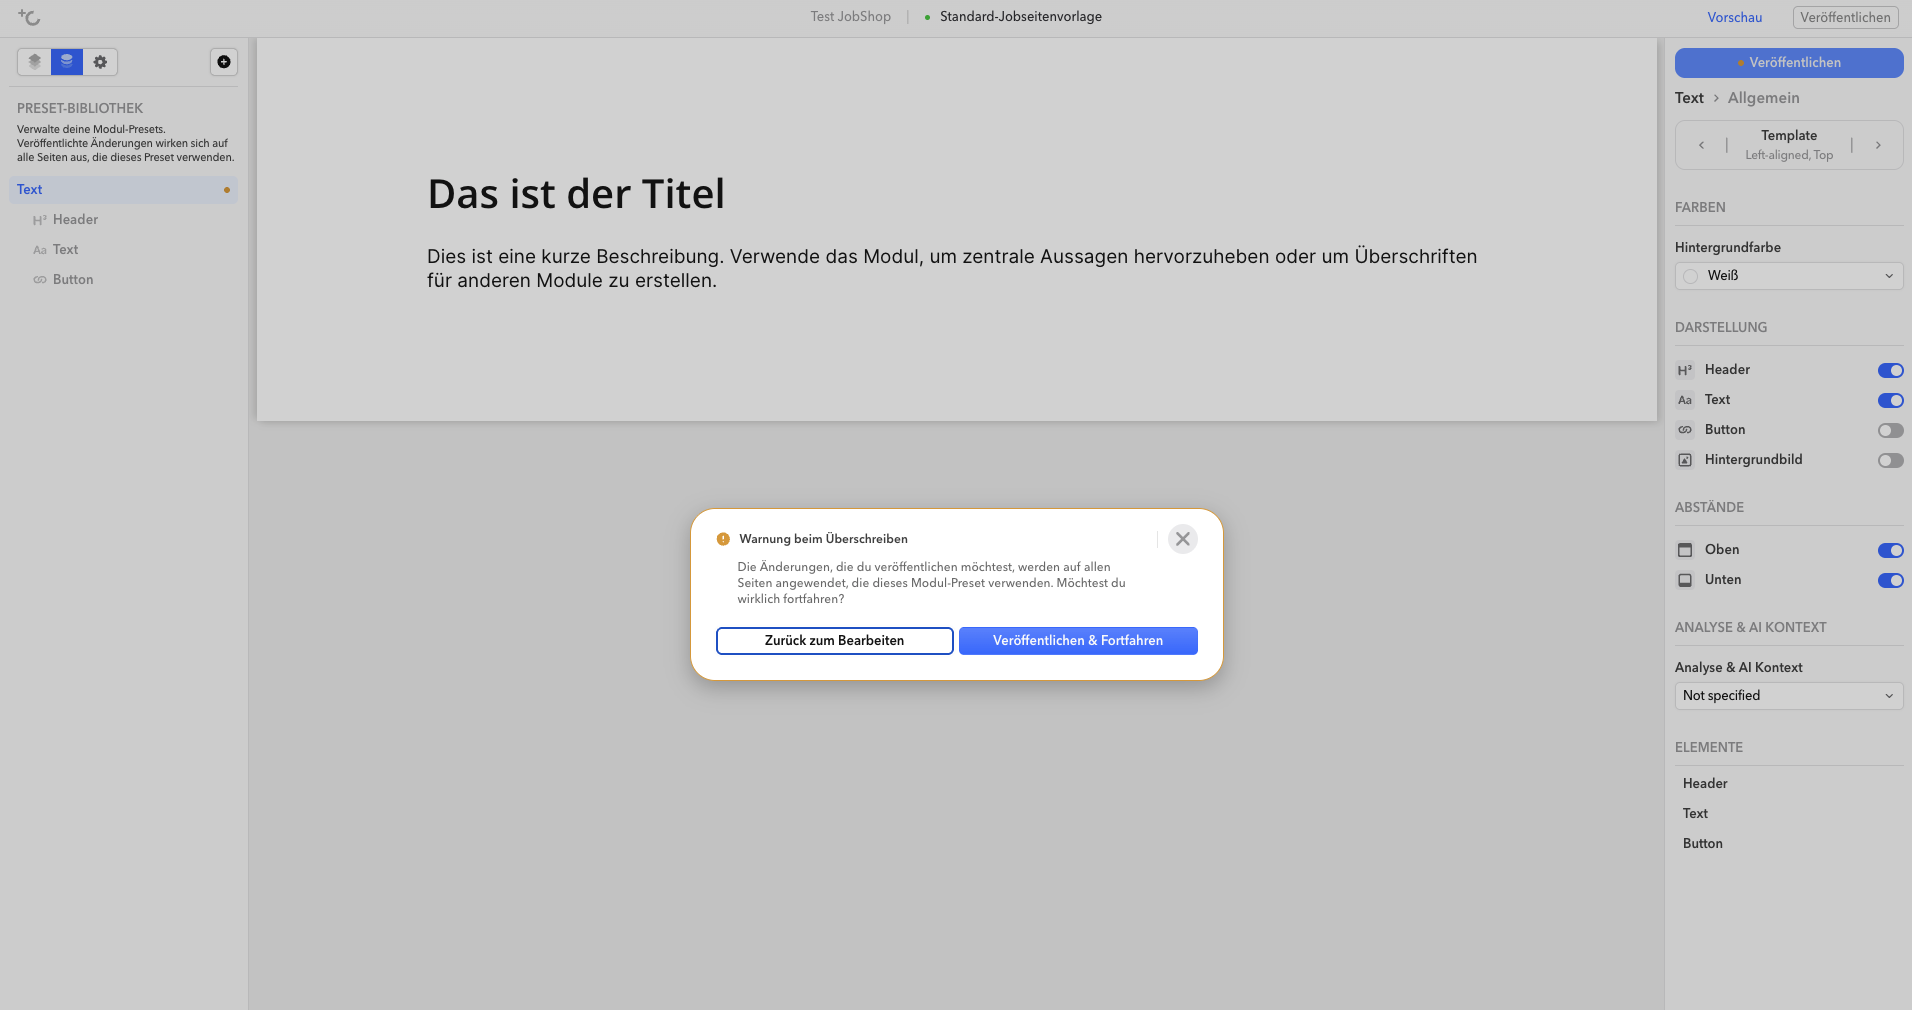
When publishing, a confirmation prompt will appear, informing you that the changes will be applied to all instances of the preset. This means the changes will be published on every page where you have used the preset. Confirm with "Publish & Continue" or return to editing.
Switch to the regular module view (page editor) and click the "Add" button to add a preset. Created presets appear here as their own selection option under the "Saved Modules" tab.
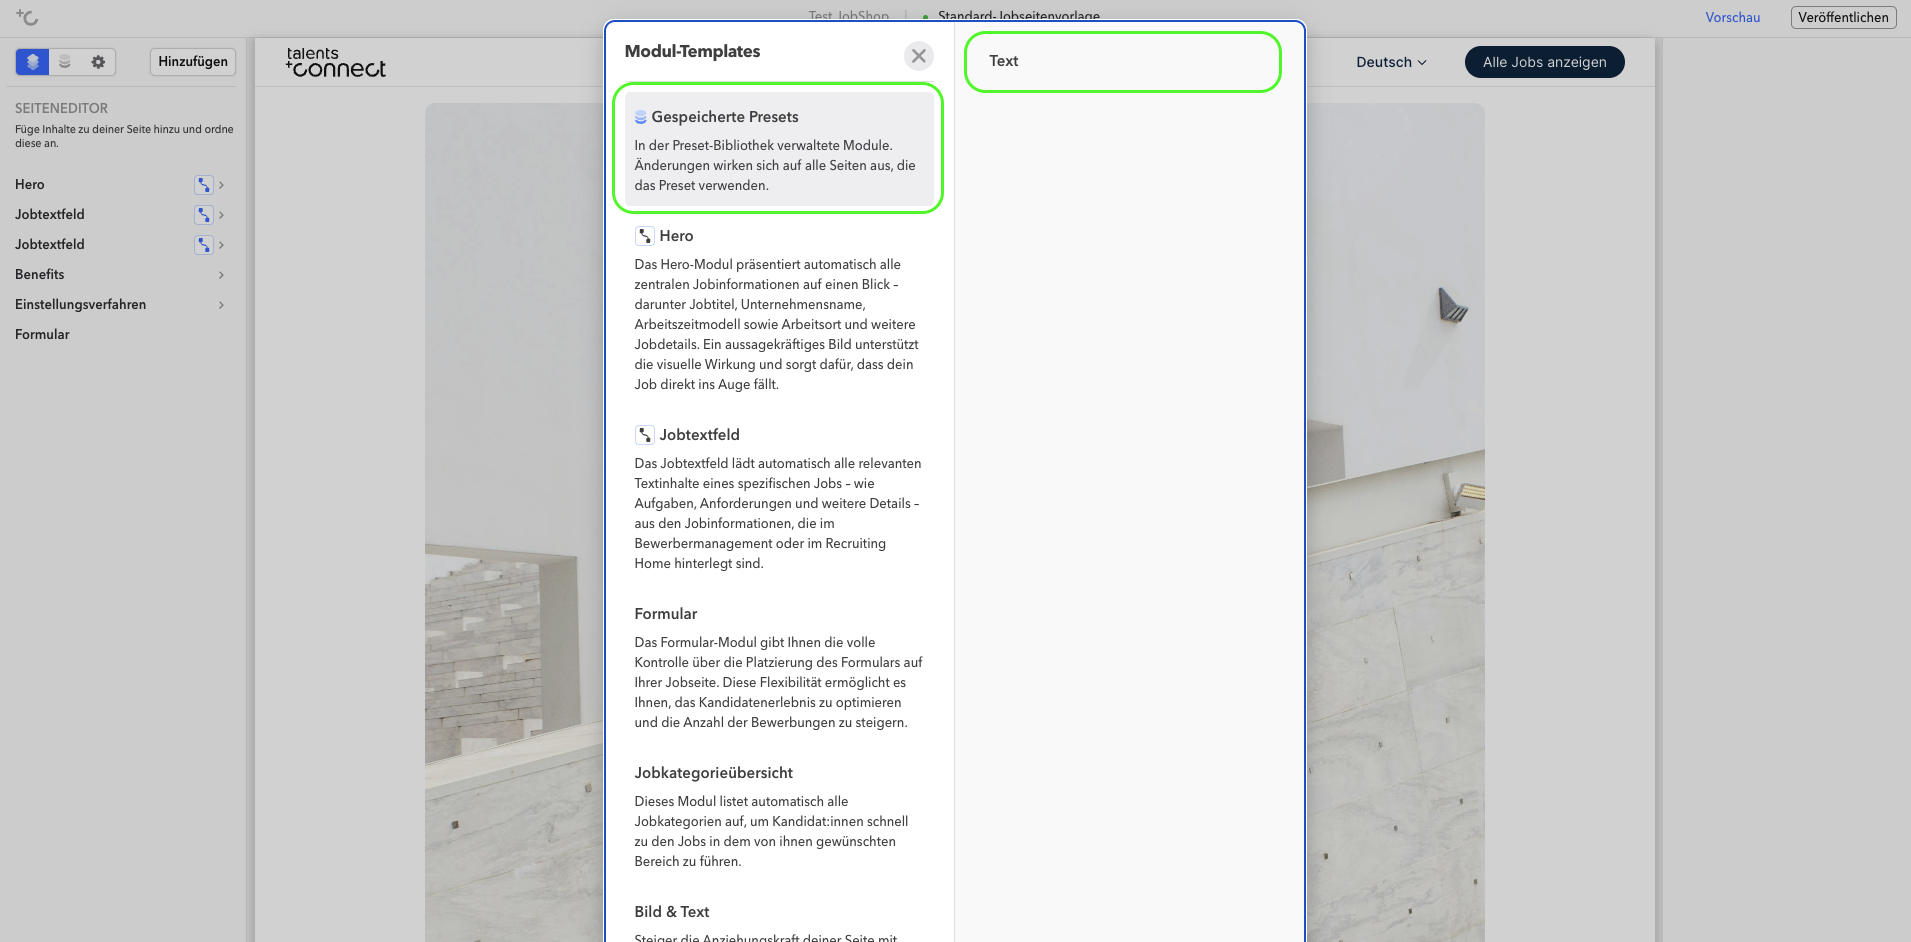
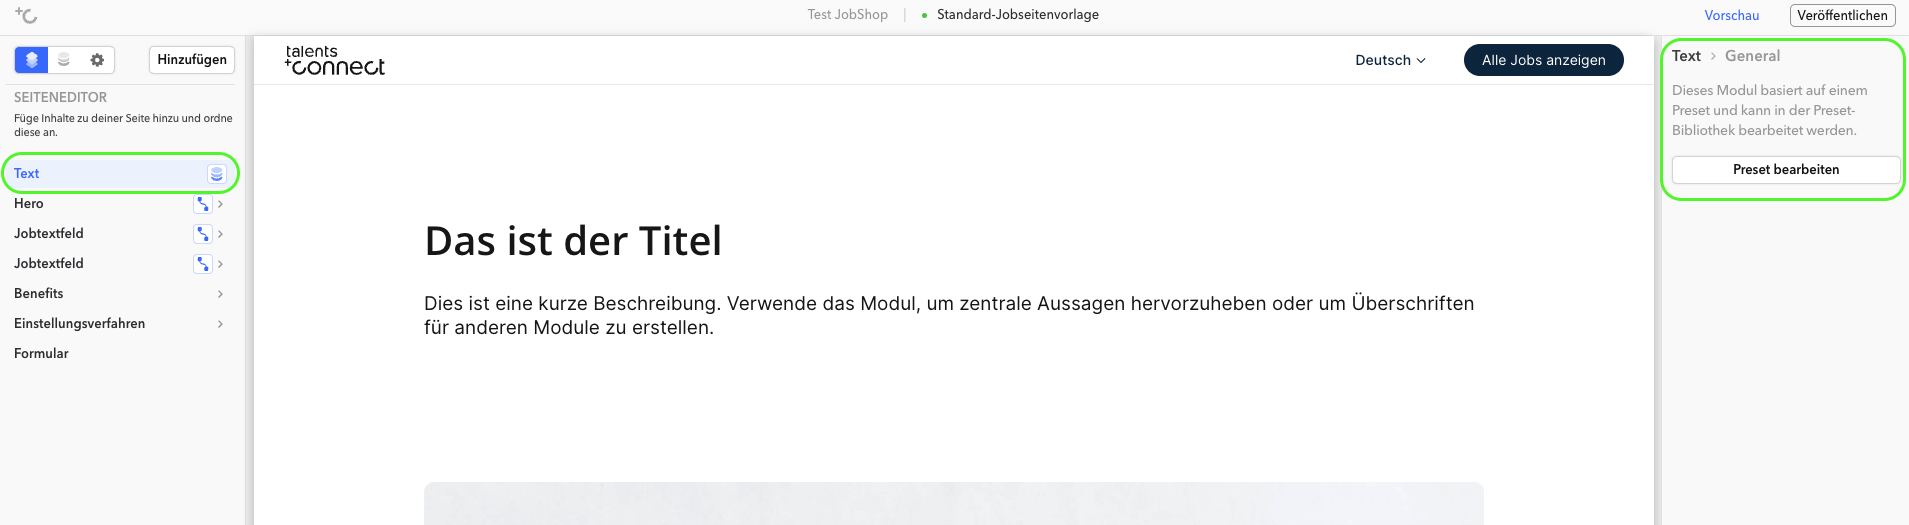
Once you have added a preset to a custom page or a job detail page, it appears like all other modules in the left column of the page editor – recognizable by the preset icon.
To edit a preset, you do not need to open the preset library separately: select the preset in the page editor and click "Edit preset" in the right column – this takes you directly to editing in the preset library.
Modules that already exist in the page editor can be saved directly as a preset – without needing to recreate the module as a preset module.
Here's how:
1. Right-click on the desired module in the page editor.
2. Select "Save as preset" from the context menu.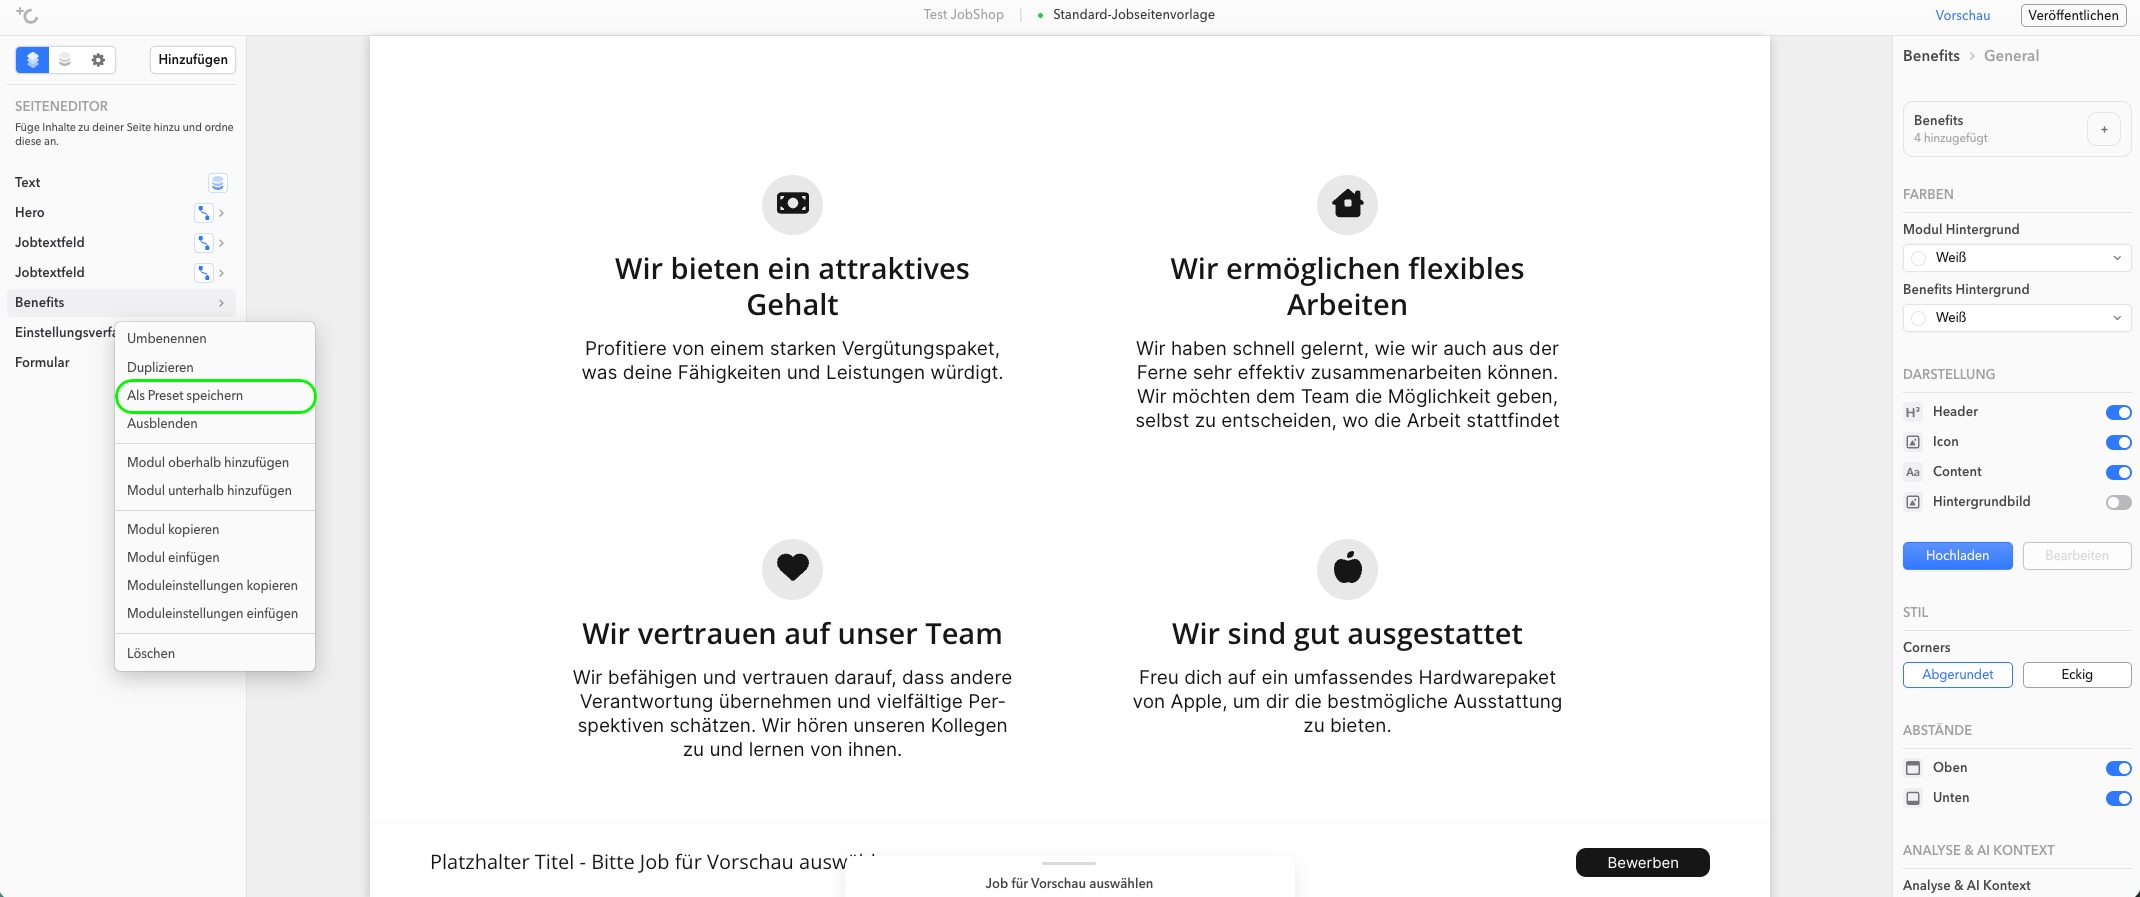
3. The preset is automatically saved in the preset library (middle tab of the three tabs).
4. Switch to the preset library and publish the newly created preset there.
How do my colleagues get access?
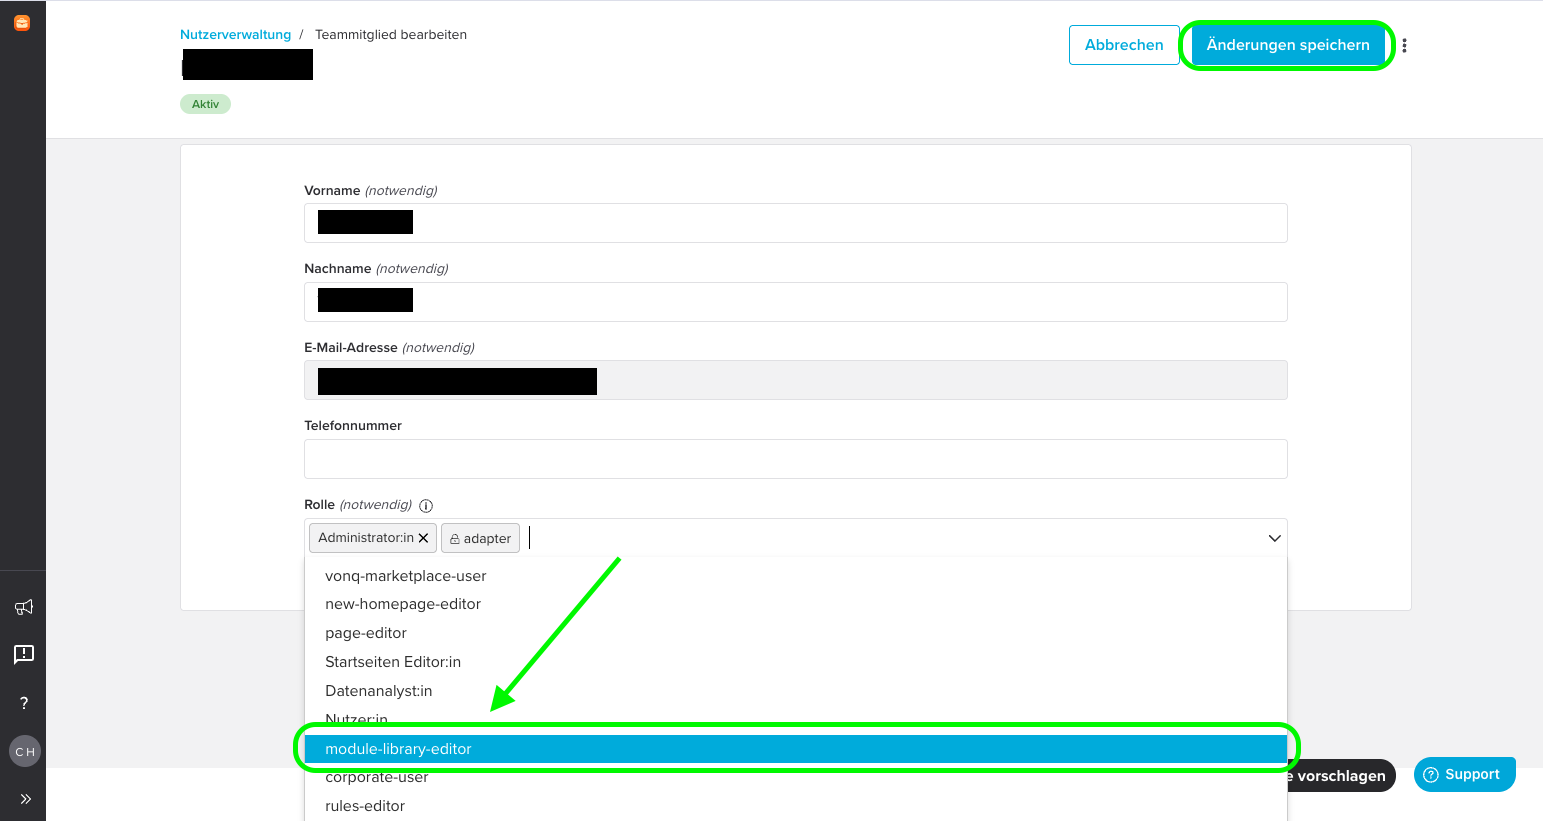
All users of your account with the "Admin" role can grant additional users access rights to the module preset library. Here's how:
1. Log in to your account or your JobShop as an admin
2. Navigate to your profile in the left sidebar
3. Select "Team Management"
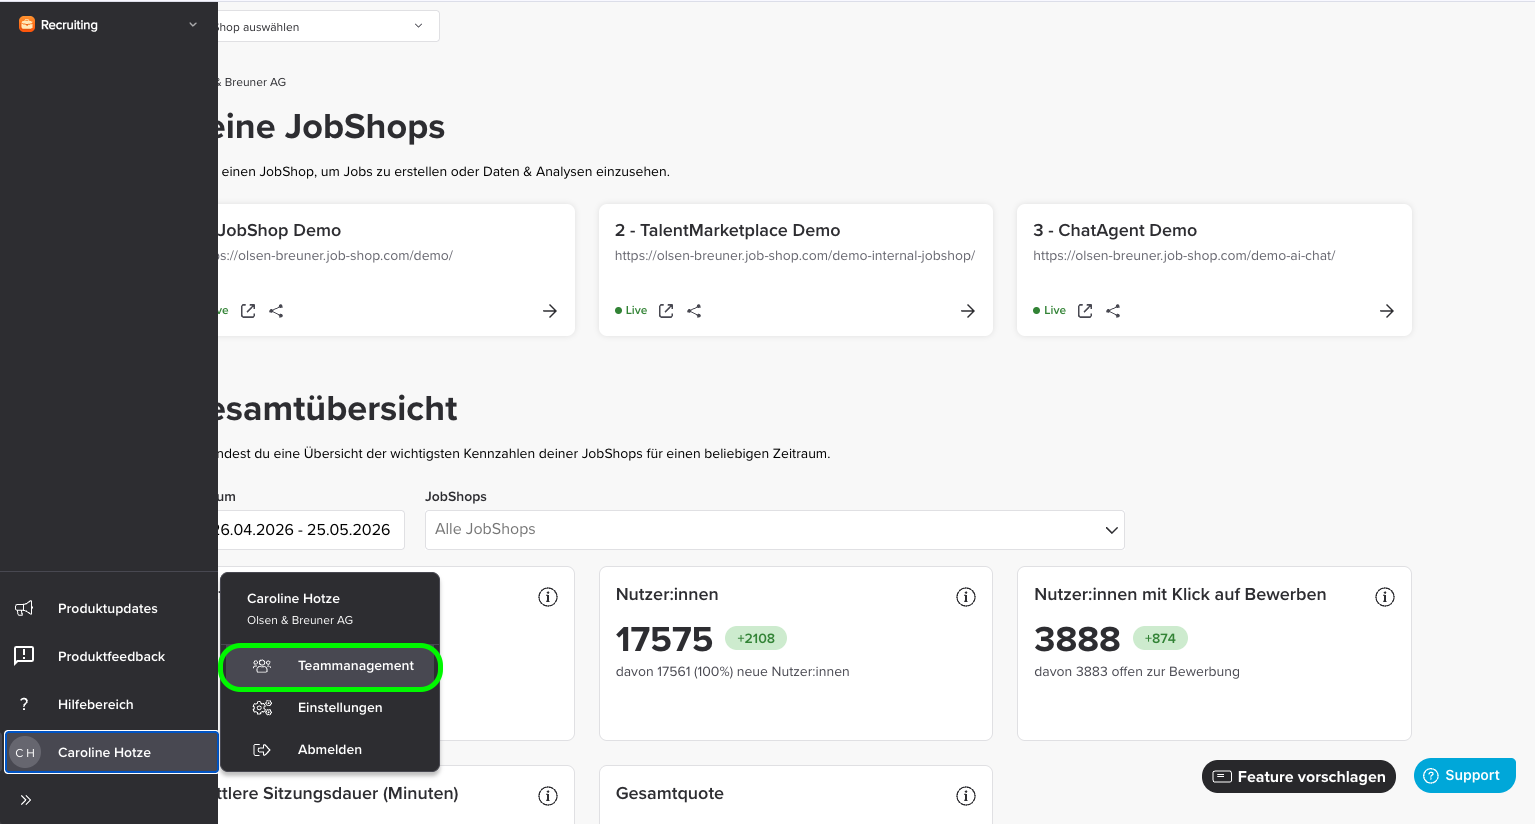
4. Find the colleague in the user overview that you want to enable for using and editing the module preset library.
5. Click "Edit" and add the "module-library-editor" role to that person.
6. Save the change
As of: May 2026 ✦ Language: English ✦ Target audience: Customers (End Users)
Was this article helpful?
That’s Great!
Thank you for your feedback
Sorry! We couldn't be helpful
Thank you for your feedback
Feedback sent
We appreciate your effort and will try to fix the article